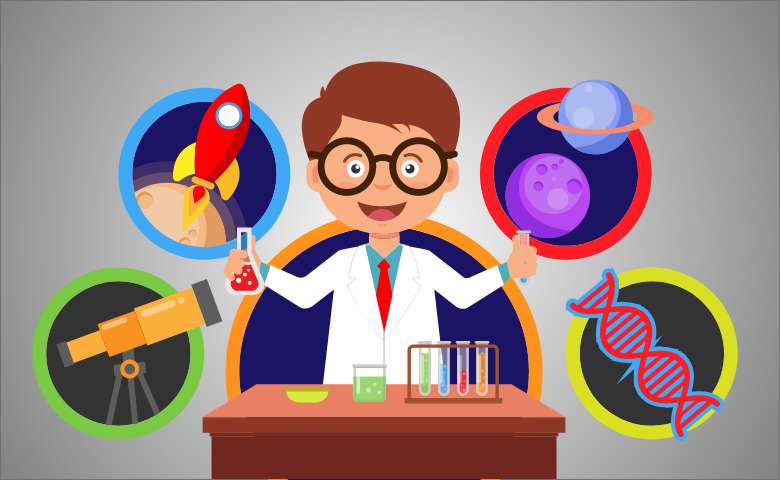
Is science an extension of our everyday world or an integral part? From our daily activities to the gadgets we can’t keep our hands off – everything has an application of science. Consequently, science forms a natural part of the growing up years for our children. Science helps them understand the why and how of even the simple things that they come across. It is important for children to develop an interest in science from an early age. The best way to spark their interest in science is to perform simple science experiments with them and introduce science concepts.
How to Develop Your Child’s Interest in Science?
You don’t really have to teach your child science, they learn it themselves by observing, asking questions and conducting experiments. All you have to do is to connect science to their daily life. Children are curious. They love exploring things. However, you just need to give them the right nudge and support. For example, consider the story of the thirsty crow. As the crow puts stones in the pot, the water level rises. Now challenge your child to think why the water level rises. Slowly introduce the concept of space and volume. Explain it in simple words and you will help them retain the concept in their minds forever.
Children learn best when they are involved in learning. Connecting science to their daily life provides them with real-life practical experience. Most importantly, children are most likely to remember a concept when they can see the phenomenon happening around them. Show them the natural phenomenon like rain to teach the concept of t
Backyard Science
Science experiments
10 Easy Science Experiments to do With Your Child
Here is a list of 10 easy to perform science experiments that can be done in no time in your backyard.
Advisory: All the experiments described below should be performed under the supervision of an adult. In no case should the child be left alone with scissors, glue, nails, pins etc.
1. Make your own Rainbow
Now you don’t need to wait for the rain to show your child a real rainbow. With this fun science experiment, you can recreate the conditions that make rainbows appear and therefore, teach your child the science lessons behind all those pretty colours.
What Do You Need?
- A nice bright sunny day
- Small drinking glass
- Small mirror
- A sheet of white paper
- Water
What Do You Do?
- Ask your child to fill the glass about one-fourth with water.
- Then, have your child put the mirror in the glass.
- Turn the glass so the mirror faces the sun such that the sunlight shines on it.
- Help your child by holding a sheet of paper in front of the glass so that the rainbow can be easily seen.
- The sunlight will pass through the water in the glass and refract (bend), forming many different colours on the surface of the sheet.
- Encourage your child to experiment by holding the glass of water at different heights and angles while they watch the sunlight bouncing off the mirror.
What’s Going on Here?
The water in the glass bent the sunlight. When the light is bent, it breaks up into different colours of the rainbow. This process is called refraction and this is how white sunlight creates a rainbow on the paper. Similarly, after it rains, lots of small water drops are still in the air and as sunlight hits the drops, the light bends to make a rainbow.
2. Magnet Magic
With this fun science experiment, you can make our own magnet and teach your child the properties of a magnet.
What Do You Need?
- Butter knife or spoon – anything made up of iron
- Bar magnet
- Iron nails (to check the magnet)
What Do You Do?
- Take the butter knife (or your iron object) and place it on the table.
- Now take a bar magnet and place one of its poles near one edge of the butter knife. Without lifting it, move it along the length of the butter knife till you reach the other end.
- Lift the magnet and bring the pole to the same point of the butter knife from where you began.
- Repeat the same process for about 40 – 50 times. Ask your child to keep counting, fun way to remember counting too!
- You have made the butter knife to act as a magnet. To verify, bring some iron nails near it. You will notice that the butter knife attracts the nails just like a magnet.
What’s Going on Here?
It is pretty simple. The properties of magnets make this happen:
- Magnets attract certain metals. In this case, the bar magnet attracted the butter knife made up of iron.
- All have a north-seeking pole and a south-seeking pole.
- When placed near each other, opposite poles attract and like poles repel.
3. Static Electricity Comb
This one is a very simple and fun science experiment that your child will love doing again and again.
What Do You Need?
- Comb
- Bits of paper
What Do You Do?
- Take a comb and ask your child to rub it on their hair. Do it a few times.
- Now, take the comb near the bits of paper.
- Some bits of the paper get attracted to the comb.
What’s Going on Here?
Every object has either a positive charge or a negative charge. Opposite charges attract each other and similar charges repel each other. When you rub the comb with your hair, the comb becomes negatively charged and the bits of paper are positively charged. Hence, the comb attracts the bits of paper.
4. DIY Pinwheels
DIY stands for do it yourself. Your child can transform a piece of construction paper into a fun toy to use in the sunny outdoors with this simple science experiment. The windmill/pinwheel is a tool that converts the energy from the wind into electrical energy.
What Do You Need?
- Construction paper
- Scissors
- Ruler
- Pencil
- Stickpin
What Do You Do?
- With the help of a ruler, measure a 6″ x 6″ inch square. Use scissors to cut out a square for making the pinwheel.
- Now use the ruler to draw an X from corner to corner on the square dividing it into four triangles.
- Cut from each corner along the line until you just about reach the centre of the square – do not cut all the way through. You will have four cuts moving diagonally towards the centre.
- Fold in one corner of each “triangle” to the centre of the square. Hold the pieces together and then secure them by pushing a stickpin through the centre.
- Secure the pinwheel to the eraser of a pencil. Bingo! Your pinwheel is ready. Notice what happens to the pinwheel when you hold it below a fan or walk faster while holding it in your hand
.
What’s Going on Here?
The windmill/pinwheel is a tool that converts the energy from the wind into electrical energy. Windmills are generally set up in the areas where the winds are strong. The wind moves the blades of the windmill, which in turn produce electric energy.
5. Your Nose Knows!
With this interesting science experiment, your child will give his nose a workout by using his sense of smell to reveal the wonders of science.
What Do You Need?
- A perfume or
- An incense stick
What Do You Do?
- Spray the perfume or light an incense stick in a corner of the house.
- Wait for a few minutes and try to smell the fragrance of the perfume or the incense stick at the other corner of the house.
What’s Going on Here?
The air around us is nothing but gas. On spraying the perfume or lighting an incense stick, the particles travel to different corners along with the air. Hence, you are able to smell them even at the other corner of the house after some time.
6. Shady Shadow
Everything we see around us is because of the phenomenon of reflection. With this fun science experiment, you can explain the concept of reflection to your child in a simple way.
What Do You Need?
- A dark room
- A lamp or a candle
- A toy
What Do You Do?
- In a dark room, light the lamp or a candle.
- Try to make shadow puppets with your hands in front of the lamp. You can use the following link to see a few ideas for shadow puppets.
- Did you observe the shadow on the wall in front of the lamp?
- Place a toy in front of the lamp instead of the hands. Move the toy near the lamp and away from the lamp and observe the shadow formed.
What’s Going on Here?
Light travels in a straight line. When you put your shadow puppet in between the lamp and the wall, the puppet blocks some of the light waves and the shadow of the object is formed as light does not pass from that region. The closer you put your shadow puppet to the lamp, the more light waves are blocked. This makes a bigger shadow. Moving the shadow puppet away from the lamp makes a smaller shadow as fewer light waves are blocked.
7. Sound and Vibration
Let’s now see a fun science experiment that uses our sense of hearing.
What Do You Need?
- A small bell
- A glass tumbler
- A tub of water
What Do You Do?
- Ring the bell and ask your child to hear the sound from a distance.
- Now ring the same bell in a glass tumbler and ask your child to hear the sound from the same distance.
- Next, ring the bell inside the tub of water and ask your child to hear the sound from the same distance.
- Your child will observe the different intensity of sound in all the three cases even though he or she was at the same distance from the bell.
What’s Going on Here?
Sound travels as waves. These sound waves need a medium to travel. In the first case, the air acts as a medium. When you ring the bell, it produces vibrations and these vibrations travel through the medium to reach our ears. In short, the bell rings normally in this case. In the second case, your child will hear a louder sound than the first case. This is because the glass tumbler reduces the air surrounding it and the vibrations are more. In the third case, the water limits the vibrations produced by the bell and as a result, the sound also reduces.
8. Sow a seed
From sowing a seed to watching it grow into a plant, this science experiment will teach your child the life-cycle of a plant.
What Do You Need?
- A seed tray or pot
- Compost
- Seeds of any flower
- Breathable cloth
What Do You Do?
- Fill the seed tray or pot with seed compost.
- Moisten the surface of the compost.
- Sprinkle the seeds evenly over the compost and cover the tray with a breathable cloth.
- Place the seed tray in a warm place. Water the tray once a day.
- Uncover the tray once you see small plants (called seedlings) germinate.
- Transplant the seedlings to the garden or a big pot and water them twice a day.
- Keep a notebook and note the progress of your seeds daily.
What’s Going on Here?
Like all other living organisms, plants too have a life cycle. Firstly, the plant starts its life as a seed. Then, it grows into a plant. The mature plant produces flowers, which further mature and produce seeds in a fruit. The plant eventually dies, leaving seeds that produce new plants.
9. Hello! Who’s on the line?
Want to have a nice conversation – here’s a fun way to make your own phone.
What Do You Need?
- Two paperclips
- Two paper cups
- About 2.5 meters of string
- Pin
What Do You Do?
- Make a hole in the centre of the base of both cups. You can use the pin to do that.
- Tie one paperclip to one end of the string.
- Pull the other end of the string through the hole in one of the paper cups. The paperclip should be inside the paper cup.
- Insert the free end of the string into the hole at the bottom of the second paper cup. Insert it from the outside of the cup.
- Pull enough string through the hole to enable you to tie the second paperclip to the end of the string.
- Now, pull the cups apart so that the paperclip rests flat on the floor of the cup (in each cup) and the string is taut.
- Hold one cup and give the second cup to your child. Walk away from each other until the string is taut. You are now ready to use your paper cup phone.
- Ask your child to hold the cup near their ear. Say something in your cup and your child can hear it.
- Similarly, hold your cup near your ear and ask your child to say something in theirs. Nice conversation indeed.
What’s Going on Here?
Speaking into the cup creates sound waves that are converted into vibrations at the bottom of the cup. The vibrations travel along the string and are converted back into sound waves at the other end so your child can hear what you said.
10. Boat it, Float it!
This science experiment is such a fun way to teach your child about the concept of floating and sinking.
What Do You Need?
- A paper sheet
- A bucket of water
- A stone
- A plastic ball
What Do You Do?
- Make a paper boat. You can see the steps on the given link.
Take a bucket of water and place the boat on the surface of the water. You will observe the boat floats on the surface of the water.- Now take the plastic ball and drop it in the water. What did you observe?
- Next, do the same with a stone. See what happens when it is dropped in water.
What’s Going on Here?
You will observe that the plastic ball and the paper boat float on the surface of the water, whereas the stone sinks in the water. Why does it happen? It is because of the density. Each object has its own density in some number. When the density of the object is less than that of the water, for instance, the plastic ball and the boat here, the object floats on the surface of the water. When the density of the object is more than that of the water, the object sinks.
To sum it up, when it comes to science, there is nothing better than doing it, seeing it, observing it and experiencing it yourself. Young children typically have an affinity for learning by doing or exploring. Age-appropriate science experiments and the understanding of the science behind them help make science come alive in meaningful ways. Such fun science experiments have all the necessary components to motivate and engage your curious child and build their interest and proficiency in science.